mold questions for redman

Fatman

Active member
Joined
May 1, 2011
Messages
10,525
Location
Northfield, Vermont
redear - I take a couple of old cookie sheets and I have a big piece of block wood. I take a hacksaw and cut some lines about a 1/4" and then put the lead block on top of it and hit it with the torch on the cut. Drip the lead onto the pan, When that chunk falls off it should be hot enough to torch in half. The move the block of lead up and do it again. Back with my old LEE pots I'd just put these chuncks in and clean the all of it and then put it into rounds or ingots that would fit my pot. Those pots lasted a long time even cleaning lead. Of course I cleaned the pots out after every use!!

I had bought a cast iron pan and an old corn bread pan, figuring on using the extra propane tank from the grill hooked up to a stand and found the wife gave it to her sister!!! So I may be back cleaning with the bottom pour or going out and buying a new one.

You're going to be surprised when you start using that bottom pour how fast those jigs and going to get done. Even with the Doit molds I pour 3-4 different molds and as two get filled the others get emptied out and new hooks and repoured. then on to the other ones and same thing. The jigs pour up quick!!!!!!!!

As far as any treatment for this illness??? NO NO NO!!!!!!!LOL you're stuck with it buddy!!!!!!!
 

redear

Active member
Joined
Jun 24, 2010
Messages
1,297
Location
Waverly, Va.
doug, thanks for the advice! Iv'e poured alot of heads with the old bottom pour and it is alot faster, I hadn't planned on pouring but a few but got on a roll, talk about old school! lol using that old school mold and pouring with a ladle, it just seems to soothe my soul. lol I did spie a new propane burner the wife bought the other day and stashed in the shed, it's free standing about 3 feet tall, really all I need is a tank and a pot, and she says she thinks there is a tank on the farm across the road, it's a hunt club house over there and all the parties get held there.
 

Fatman

Active member
Joined
May 1, 2011
Messages
10,525
Location
Northfield, Vermont
If you get a cast iron pot make sure to check your stand to see if it's better for a flat or rounded bottom pot. One thing I do like about the pot is it has a lid!!! The first time I tried to use mine on the side burner of the grill the rounded bottom was really unstable, plus I had to put some pieces of 2x4 for extra support of the side burner tray. Really have to look for a stand.
 

redear

Active member
Joined
Jun 24, 2010
Messages
1,297
Location
Waverly, Va.
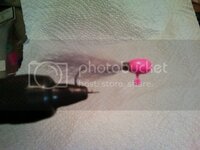
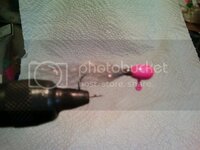
thanks doug I'll have to get it out of the shed and look at it. why do people use cast iron pots so much in stead of a steel one? this burner looked like it was actually solidly built into the stand, the quality wasn't top notch as it came from agri supply where my wife works and she got it for ten bucks for some reason, it had to be a return or something was wrong with it. they deal in alot of cheaper made products. painted up most of those pinky heads this morning, did some pink and some brite green, and some green chart. two more nite shifts and I'll have some time off. nead a break. lol
 

Fatman

Active member
Joined
May 1, 2011
Messages
10,525
Location
Northfield, Vermont
redear - have no idea why one pot over the other. When I asked about it here and over at Cast Boolits everyone recommended the cast iron.
 

redear

Active member
Joined
Jun 24, 2010
Messages
1,297
Location
Waverly, Va.
doug, the wife has suggested she buy me a smaller burner, and says they are only about 12 bucks, she thinks the big one may be too big and cumbersome for what I want to do, she may be right a smaller pot may not sit on that one very stable. need to pour some of those 1/24 flattened redman heads too. I'm still in the mode of fixing up the wife and boy some hunting arrows, seems they have lost half the ones I made them, practicing.
 

toadfrog

Active member
Joined
Jun 28, 2010
Messages
2,815
Location
OKLAHOMA
On a side note about lead . I had some 50 lb blocks of lead . The most effective way I found to cut it up was with a chain saw . I spread a 10 ft cheapo tarp down set up a saw horse with a piece of 1/2'' ply wood on it . Put the lead on there fire up the chain saw and go to town. You save all the lead chips and anything that gets mixed in will burn right off .
 

redear

Active member
Joined
Jun 24, 2010
Messages
1,297
Location
Waverly, Va.
I cut three slices off it with my table saw, but those little shavings were hitting me pretty hard, but I got alot of waste, I coulda made alot of heads with what ended up as shavings. It's all good though, I can pour whatever I need with the ladle till I get straight. about to get off work this morning, and taking tonite off so will be off till wednesday, will give me plenty of time in the shop.
 

Fatman

Active member
Joined
May 1, 2011
Messages
10,525
Location
Northfield, Vermont
Do it with a table saw again and keep a cover in front of you and whereever the shaveings are going you can get most in a tarp and use them up. When I trim jigs, if there's any flash that goes in a small bag till the next pouring session as a starter
 

redear

Active member
Joined
Jun 24, 2010
Messages
1,297
Location
Waverly, Va.
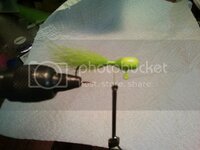
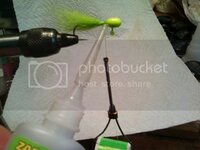
I tied up eight of those pinky heads today, gray hair and pink head, three of them had the gray synthetic flash blend, or sf flash blend as they call it. also been painting up those other 35 heads I poured the other day. supposed to rain and thunder tomorrow so may try and pour some more heads, need to do some of those 1/24 heads I made a mold for too.
 

CrappieHappy

Moderator
Joined
Feb 7, 2011
Messages
5,281
Location
Midlothian, TX
Sweet looking forward to the pics Kip. I need to buy some of that sf flash and Kip to practice with.

I sent you a little something something that should fit right in your lee pot...
 

Fatman

Active member
Joined
May 1, 2011
Messages
10,525
Location
Northfield, Vermont
Glad to see you got a couple of days off in a row!!!!!! I like the kip but some folks have trouble with it and use calf body hair.

The more stable your pot the safer you'll be, another idea is when you're using the table saw use a shop vac, what ever you suck up dump it in the pot and a little sawdust won't hurt.

They're talking going to the fair tommorrow and I DON'T wan to go!!!!! If I can stay away from it I might get to do some pouring done.
 

redear

Active member
Joined
Jun 24, 2010
Messages
1,297
Location
Waverly, Va.
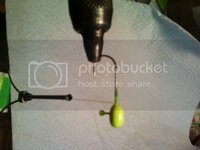
wanted to do some pouring today but had absolutely no energy, it takes a few days to get over the nite shifts, and usually a couple days after I finish them it hits me, rained like crazy last nite and today, flooded all the crop feilds on my farm, didn't hurt the crops tho. heath, thanks for whatever ya sent me! much appreciated! doug, using kiptail takes getting used to for sure, and all tails are not created equal, grandpa bobs are the best Iv'e used but I hate the waite and the backorders, never the less his are the best. first thing ya gotta do is select the right hair from the tail, this is crucial as a tail will have hair useful for about three different sizes of jigs depending on where on the tail it's cut from, and you have to select just the right amount for the jig when you cut a clump off the tail, this can only come from experience, select bjust slightly more than what you will need because after you get done pulling the wild hairs out, and the underfur the clump will be smaller. there are rare occasions where the tail is so good that this wild hair and under fur culling need not be done.
-975D-423A-83C4-08CABAEE9EC0-7338-00000DEA3CA92F9E.jpg
 

redear

Active member
Joined
Jun 24, 2010
Messages
1,297
Location
Waverly, Va.
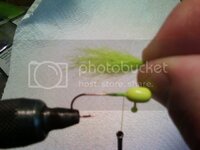
so it takes some messing up to determine the right amount of hair to cut off the tail. always cut the hair as close to the skin or bone as possible, this keeps the stubble from getting mixed in with your next hair clump. I select and cut the right size clump of hair for the jig I'm tying, and once I cut it from the tail I never lose grip on it or it's all over! lol I will pull some wild hairs from the clump as well as whatever underfur I feel like is too bulky, again experience. then I cut the base off the hair fibers about 1/8" or so longer than what I need, I trim the base of the hair clump at an angle, about 45 degrees, with the longest fibers on the bottom side of the clump as I'm holding it. I have already laid down a thread bed behind the jighead and left the thread right behind the head, I take the hair clump in my left hand and put it on top of the hook right behind the head, at a downward angle and I split the hair clump volume wise as I push down on the hair clump and the hooks shank splits the clump.

-360C-4867-B158-0BA66C78275D-7338-00000DEA5CCB3D9B.jpg
 

redear

Active member
Joined
Jun 24, 2010
Messages
1,297
Location
Waverly, Va.
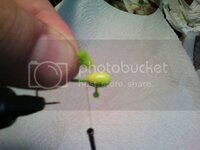
I am holding the hair clump down on the hook just behind the head at a downward angle and the hook has split the clump of hair and the bottom fibers of the hair clump are protruding a little farther forward, this keeps you from missing wrapping any hair fibers when you make your first few wraps with the thread. ok, make about 4 or 5 wraps with the thread but loose enough so you can move the hair around the hook and pluck wild hairs etc. so it's wrapped 4-5 times loosely and you have plucked the wild hairs and moved the hair around under the loose wraps for even coverage all around the hook. then when you like the look of the hair you hold the hair tight with the left hand finger and thumb tight, and you unwrap the thread with the other hand till you get down to the first wrap, then you push the hair clump forward just a little so the hair rides up on the jighead a little, how much you push it forward will determine the length of the hair wing, and now you make 2 wraps semi loosely just behind the head, and holding the hair in place so it won't spin around the hook you pull down on the thread so it tightens, then you wrap a couple more times hard and check the position of you hair to see if it's moved on you, if there are any gaps in the hair around the hook, you will have to unwrap a couple wraps and udjust the hair, after you are satisfied wrap about 10 times hard trying to keep up against the head.
-47C8-46C3-8153-5F12EACC4463-7338-00000DEA68857068.jpg
 

redear

Active member
Joined
Jun 24, 2010
Messages
1,297
Location
Waverly, Va.
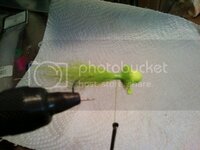
after this you will have the hair butt fibers riding up on the jig head, so you take a single edge razor blade and press down on the hair fibers just barely in front of the thread wraps. you do this using the leadhead as a backstop for the razor blade, you do this all the way around the head, then you unwrap the thread 1 nor 2 times exposing the hair fiber butts a little and you touch some crazy glue to the hair butts, it'll soak into the butts, do this all around the head , don't use too much glue it'll make a mess, then I take a paper towel and touch it to the hair butts that have been soaked with glue and the excess will soak into the paper towel, next I wrap over those hair butt fibers 1 or2 times and cut my thread with 14 inches to spare and hand whip finish riding the thread wraps up on the back of the jighead.

-9CF5-4279-ABBE-E7CEB23418AB-7338-00000DEA9AA4F36E.jpg
-CE76-4B9F-8621-385D8418229D-7338-00000DEAAFC6C3C1.jpg
-02FD-4E8F-B5B7-0EC3CDB6ED3F-7338-00000DEAA96C6CE5.jpg
 

redear

Active member
Joined
Jun 24, 2010
Messages
1,297
Location
Waverly, Va.
I use 210 denier flat waxed nylon thread for 1/16 hair jigs, and 140 denier for 1/32 hair jigs.
Just thinking, I probably use more than 4 or 5 loose wraps when first wrapping the hair on the head, 7 or 8 would probably be better to keep the hair from spinning around the hook, doesn't matter what it looks like at that point as you'll unwrap those thread wraps after you get your hair adjusted right.
no matter how good you get, you will always mess one up now and then.
In the beginning people tend to use too much hair, this will keep the hair from having movement in the water.
A good rule of thumb, especially with lighter colored hair is to hold the jig up to the light, and you should be able to see light thru the hair, this amount of hair gives the hair more transluscency in the water which mis a good trait to have.
people tie these things on roundheads also , and the redman head makes a good one too.
the little 1/64 and 1/32 roundhead jigheads work great too, and I use the shorter hair at the bottom of the tail for the smallest jigs.
 

redear

Active member
Joined
Jun 24, 2010
Messages
1,297
Location
Waverly, Va.
now the sf flash blend is something that Iv'e not fished with yet but have tied s few with it.
jiggerjohn claims that this stuff is more effective tied very sparsely, and also a little longer.
I think this makes sense because it is stiffer than the kiptail, and tying it in this manner allows it to have some movement in the water.
It does have a very fish catching look, with the holographic flash mixed in.
with all the synthetics Iv'e tried this sf blend is the only one that I'm satisfied with as far as being a replacement for kiptail. thanks to jiggerjohn for revealing that the thinner look is better.

-1EB0-482A-999D-A1328DD4E7B5-7338-00000DEAC08520B2.jpg
-47AB-4505-A7E3-47706AB575EE-7338-00000DEABBC5BE73.jpg
 
Back
Top