mold questions for redman

redear

Active member
Joined
Jun 24, 2010
Messages
1,297
Location
Waverly, Va.
redman,- I hear ya ol master! will have to try it for sure. gonna make a couple new head blanks for the redman style head, to replace the ones I flattened a little, and also need to cut my aluminum up into peices, probably do this stuff thurs. and fri. hows that garage comming? I know it's gotta be hot out there. I have a couple window units in the shop and it takes a while for them to even start cooling the place down. the thing about va. is the humidity.
 

redear

Active member
Joined
Jun 24, 2010
Messages
1,297
Location
Waverly, Va.
got home from work last nite and went out to the shop for a little while, and took that new peice of aluminum, and marked it for cutting with a sharpie. took it over to the bandsaw with a fine tooth blade and cut six peices off of it measuring 2"x2" each, probably be a little smaller when I'm done squaring them up on the sander. the bandsaw actually did a good job on the alum. I could tell this alum. is softer than the other stuff Iv'e used. starting to eyeball my drill bits and allen wrenches for a suitable jighead blank material. got to sweating out there so much I had to laugh. sure is humid. lol
 

redear

Active member
Joined
Jun 24, 2010
Messages
1,297
Location
Waverly, Va.
hey ya'll,
seems there are a couple people toying with the idea of eventually doing something like this, just in case someone decides to jump into this, maybe I should make a list of things and tools that I feel are necessary. here goes.

aluminum for the mold itself - there are lots of different types or alloys of alum. and some of them are better suited for this than others. besides the alloy designation such as 6061 or 6063 etc. they also temper each one of these alloys to several different tempers, the higher the temper the harder ir will be to press a jighead blank, also some alloys are harder than others. the alum. I just got and haven't used yet is a 6063 alloy in a half hard, t52 temper, it is softer and easier to work with than the 6061 t6 I have been using. I have been buying my alum. from online metals, also called thyssen krupp metals. just to be clear, a t6 temper is much harder than a t0 or a t1 or a t5 etc.
 

redear

Active member
Joined
Jun 24, 2010
Messages
1,297
Location
Waverly, Va.
brass pin material - I use 1/4" round brass rod material to cut small peices off of to make my alignment pins for the mold. there are different types of brass also but don't think it makes alot of difference using one over the other. I bought 3 peices 36" long recently from the same people I bought my alum. from. a person could also use other metals for these pins, but brass is so much easier to file and shape than steel, and you will be filing and sanding these pins to get them to fit the holes youv'e drilled for them properly.

drill bit - I use a 15/64 drill bit to drill the holes in the alum. for the alignment pins. this drill bit is about 16 thousanths smaller than the 1/4" brass rod used for the pins. do yourself a favor and buy the split point drill bits if you have a choice, they cut much easier and don't walk on you either.
so you will be filing about 8 thousanths of an inch off the brass rod all the way around to get it to fit the drilled holes in the alum. I do this by putting the brass pin into a lathe or drill press and while it's turning, I stroke a file across it. If you are like me you will mess up about 40% of the pins you shape by taking a little too much off. hence the 9 foot of brass rod I bought. lol
 

redear

Active member
Joined
Jun 24, 2010
Messages
1,297
Location
Waverly, Va.
old drill bits etc. - this is used for making into the jighead blank that you plan on pressing, I have so far used the butt end of drill bits, allen wrenches, which by the way is some very tuff steel, and the shank from a hardened bolt. the harder the aluminum you use for the mold, the harder the blank steel needs to be.

tools - In my opinion you will need a drill press to drill the alignment pin holes, if you do it with a handheld drill, the holes will be wallowed out from side to side movement while drilling. I have done it with a handheld drill, but I used an old drilling jig fixture I had custom made, in my bow making days. It's much easier to put the mold halves piggyback into a vise under the drill press and drill right thru both halves at the same time.

once you drill one hole all the way thru both mold halves, you will need to fit this hole with a brass pin, before drilling the second pin hole on the other side of the mold.
 

redear

Active member
Joined
Jun 24, 2010
Messages
1,297
Location
Waverly, Va.
when you are drilling the aluminum take your time and stop to clean the drill bit off about every 1/4" of penetration, because the aluminum tends to clog up the flutes of the drill bit making it fatter and causing your hole to be bigger than the bit.

countersink cutters - these are used to make the inverted cone shaped sprue holes were you fill the mold with lead. I order these from victor machinery in new york. my favorite one has a 1/4" shank and about a 1/2" diameter cutting head, and only has one cutting flute, it has a narrow angle to it, in other words it goes pretty deep without getting real wide, they come in different angles.
 

redear

Active member
Joined
Jun 24, 2010
Messages
1,297
Location
Waverly, Va.
countersink cutters - I think my favorite one is 82 degrees not sure and my wider ones are 60 some degrees.

1/2" peices of iron or steel - I use one of these to lay on top of the mold when I am pressing a head or hook, this gives the base of the jack something big enough to sit on and also protects the mold and spreads out the pressure, mine is a peice of tool steel 1/2" thick, and about 3" by 6".

files - for shaping the brass pins and cleaning up the outside edges of the mold where they have been sawed. I use a belt sander for cleaning up the mold, but it is not necessary to have a pretty exterior to your mold for it to be funcional.
black waterproof sandpaper - I get this at the hardware store, and use it to face and reface the inside surfaces of the mold after each pressing, by laying a peice down on a flat hard surface and taking a mold half and laying it face down on the far side of the sandpaper, and then with even pressure, pulling the mold half towards me, picking the mold half up and placing it on the far side of the sandpaper again and repeating this 8 or 10 times to resurface the mold, getting rid of the bulges in the mold face caused by pressing a jighead or hook. whatever you do, don't sand the mold half back and forth, the mold face won't stay flat doing that, just pull or push the mold half one way, pick it up and start again.
 

redear

Active member
Joined
Jun 24, 2010
Messages
1,297
Location
Waverly, Va.
black waterproof sandpaper - I'm sure other types of sandpaper will work but this stuff works reall good.
180 and 220 grit for resurfacing the mold halves removing the bulges caused by pressing jigheads and hooks etc,
320 grit for a finer finish and polishing brass pins while the drill press turns them. also for polishing jighead blanks as the drill press turns them.
600 grit - for a real fine polish on jighead blanks and brass pins.

I have a small lathe which allows me to work on jighead blanks etc. in a more comfy position but a drill press will do the same thing.
I shape my jighead blanks with a dremel tool and varius sanding and cutting things, one of the most used is a 1 1/2" cuttung wheel, that fits on their quik detach mandrel, also the little sanding drums that fit on the rubber cored mandrel, I can cut the drill bit down to shape in short order with the cutting wheel, the rest is just sanding and smoothing for a nice smooth finish. to finish I pinch the jighead blank between forfinger and thumb with a peice of sandpaper while it's turning.
 

redear

Active member
Joined
Jun 24, 2010
Messages
1,297
Location
Waverly, Va.
ok, we have,
aluminum, approx. 3/4" thick and 1 1/2"-2" wide and 2" - 2 1/2" long depending on if you want a two cavity or single cavity mold.
1/4" brass pins- the pins we use for pressing need to be longer than the pins that will end up being permanent, the reason is when pressing a jighead blank for the first time, the mold halves are gapped apart, and the pins need to be able to span that gap plus go into the opposite mold half far enough to provide adequate guidance and support while the hydraulic jack is squeezing it together.

when I make the brass pins, be it the longer ones for pressing the jighead etc. or the shorter ones which will only stick out about 1/4", the process is the same. they are made slightly tapered, as far as the part of the pin that is inserted into one half of the mold.
I keep shaving that pin down with the file concentrating more on the end of the pin, until it will fit into it's hole in the mold just a little, this tells me to slow way down and take only one or two file strokes at a time, while checking for fit in the mold half. I will even roll up a peice of sandpaper and put it inside the mold half hole and twirl it around smoothing out the inside of the hole and slightly widening the mouth of it too.
 

redear

Active member
Joined
Jun 24, 2010
Messages
1,297
Location
Waverly, Va.
I always drive the pin into the mold half from the inner mold face towards the outside surface of the mold, and when I drive it back out, it goes back out the same way, otherwise it'll get too tight and get stuck. after you have two pins fitted into a mold half with a good 1/2" sticking out, then you must shave those exposed sections of the pins so they will slide into their holes on the other mold half.
I don't taper these pin ends but try to keep them parralell, because their holes are paralell too. the fit you will get when you first get the two mold halves together for the first time will be tight and you will probly need a putty knife to pry them apart.
you want to be able to push the mold halves together and also get them back apart, like I said a putty knife is something I use alot. if the mold halves will not go together all the way, you need to remove the tight pin or pins and polish them some more, or maybe polish the inside of a hole with the little roll of sandpaper.
 

redear

Active member
Joined
Jun 24, 2010
Messages
1,297
Location
Waverly, Va.
the idea is for the mold halves to fit together with the longer pins and then not have any play between the two mold halves.
at this point you are ready with your mold, and you need a jighead blank the exact shape of your jighead you are trying to produce.

the other things you need are a hydraulic bottle jack, I use a 4 ton, and also an iron frame.
my frame is made like an upright rectangle, and has very heavy 3" square iron tubing with 3/8" wall thickness, for the top and bottom sections, in other words the mold sits on the bottom one and the jack pushes against the top one, they haven't bent yet. the four corner supports are 1" angle iron 1/4" thick. I have to measure the inside height of my frame, somewhere around 16 or 17 inches. just tall enough to put the mold in there with a 1/2" steel plate on top of that and my jacks bottom sitting on top of the plate and the jacks ram only about an inch from the top of the frame.
it only takes a few pumps at this point to make the jack ram contact the top of the frame. once this happens firmly, the jack and mold etc. will stay put and won,t require holding to keep from moving.
 

redear

Active member
Joined
Jun 24, 2010
Messages
1,297
Location
Waverly, Va.
you will lose track of how many times you press a jighead blank, and a hook and knock the pins out between all this to resurface the mold halves, only to press this stuff again and repeat, nevermind a two cavity mold. lol I also press a tiny drill bit in the place where I want my sprue hole, and then later drill it a little bigger. by the time you get your mold close to being done the pins will be looser than when you started.
alot of the reason you will be pressing and refacing so much is that evrytime you press something like a jighead blank or a hook it will cause a bulge in the alum. around it, also pressing the head will bulge alum. into the end of the hook slot and vise versa, so it's back and forth.

there is another method that I would not be afraid to try if I didn't have a jack and a frame, and I used this method on my first mold quite a bit with success.
this involves laying the mold on a sturdy steel surface that is flat, like an anvil platen, then laying a 1/2" thick peice of steel or iron on top of the mold to protect it.
then with your jighead blank sandwiched between the mold halves, strike the steel plate directly over top dead center, of your mold especially the part of the mold where the jighead blank is located, in other words you want a straight down force directly over top the jighead blank.
only strike it once, then pull your mold apart and check your progress.
I always tape jighead blanks and hooks down to the mold surface, before I put the mold halves together for pressing, with cellophane tape, it won't interfere and I can be sure nothing has shifted while sliding the mold halves together.

 

redear

Active member
Joined
Jun 24, 2010
Messages
1,297
Location
Waverly, Va.
oh yeah, I used a 4 lb. hammer when I did that little striking thing, you do not have to hit it very hard to get results when using that heavy hammer head. I don't think a regular 16 or 20 ounce hammer would do very good.
 

redear

Active member
Joined
Jun 24, 2010
Messages
1,297
Location
Waverly, Va.
went out to the shop tonite and used the belt sander to clean up the edges of those three sets of aluminum blocks, clamped each pair together with a c clamp and sanded them as a pair. also made a 1/16 redman style jighead blank, it took a while as the material was a hardened alloy pin, man was that stuff hard, but thats what I want. I think I'll try and make a couple molds at the same time if everything works out.
 

redear

Active member
Joined
Jun 24, 2010
Messages
1,297
Location
Waverly, Va.
worked out in the shop for a while today, shaped and sanded on two different jighead blanks, one was a redman 1/16 or so, and the mother was a 1/16 pinkie jih head style, a lengthwise watermelon shape, it may be a little heavy at 1/16 unless I shape it some more. took a couple pics of the process today too.
 

redear

Active member
Joined
Jun 24, 2010
Messages
1,297
Location
Waverly, Va.
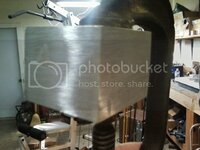
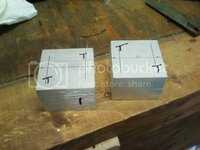
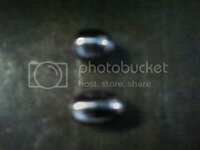
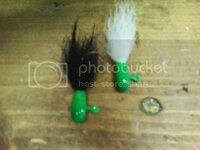
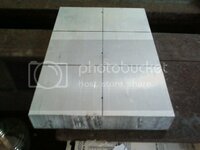
thanks heath for posting the pics! the first pic is the peice of aluminum after I cut six squares off of it with the bandsaw, so half of the alum. still remains to be cut, notice the lines I marked on it with a sharpie, they were 2"x2" squares. the second pic is two peices of alum. stacked atop each other and clamped with a c clamp so I could sand both peices together, hard to tell it's two peices after sanding because you can't see the seams after you sand them. pic three is stacks number two and three, they have been sanded some on the sides but still need some more. when I say sanded, I mean the sides only, to clean up the rough edge the bandsaw left. pic four is the two jighead blanks I worked on today, not sure I like them as good as some that Iv'e already done, the redman head is a little fat for it's length and a little more rounded in the front. I know it's not a very good pic, hard to tell, the one below that one is a pinkie style jighead blank, and it looks a little heavy for 1/16, may like my other two pinkie style blanks better, haven't decided.
 
Back
Top